Have you heard of or tried Beadographer? Beadographer is a web-based bead pattern design tool. If you currently draw your beadwork patterns by hand on bead graph paper and are looking to do this on your computer or I-Pad instead, beadographer can help you do that.
There are several advantages to using bead design applications over designing on paper. I like that bead programs give a more realistic representation of my project. Most create the bead grids based on the size and type of beads you specify and provide the approximate finished size of the project. They also have libraries of the different bead colors for different manufacturers, so you’re not limited to marker or pencil colors – and you can even get an idea of how different bead finishes will look.
Prior to Beadographer, I used BeadTool 4, but there are a few features of Beadographer that I think really make it stand out, so I’ll make sure to tell you those. Before I get there, I’ll start with the basic info.
Beadographer is accessed from your web browser and does not require any installation on your computer or I-Pad. They recommend using the Chrome browser.
You can use beadographer for free or pay an annual subscription fee (currently $6.99) that provides additional capabilities such as saving your bead palettes and designs. The free version allows you to use all the tools and take a picture of your design, but you can’t save it, edit it, or export it.
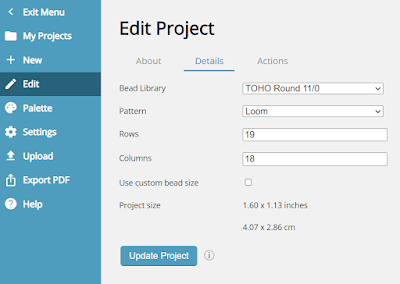
Using Beadographer, you can design bead patterns for seed beads, cylinder beads or plastic fuse beads. I’ll focus on using it for beadwork, not fuse beads.
It can be used to make patterns for several different popular bead stitches and techniques such as loom, brick, peyote, herringbone, and right angle weave as well as some variations of these techniques such as a triangle, warped square, peyote star, huichol, and a medallion shape. And it also does grids for 2-drop and 3-drop versions of peyote and brick stitch.
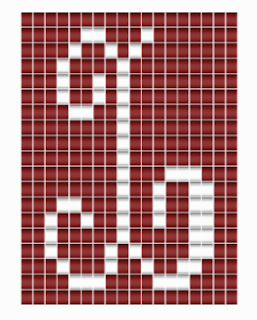
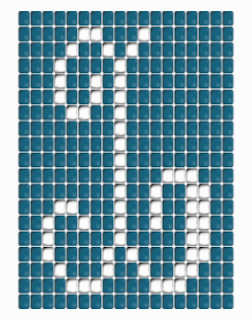
The bead shapes are squared off for cylinder beads (left) and curved edges for round beads (right). I like that I can switch between different types and sizes of beads to get an idea of how it looks as well as the finished size of a design. I don’t think you can use multiple different types of beads or sizes in one design (but wouldn’t that be fun!).
This is a design for an initial ‘L’ in loom or square stitch that I recently made.
I am still relatively new to using Beadographer, so I will update this review periodically as I use different features. I subscribed, so I am able to save and edit my designs. Note that this is not a sponsored post, nor are there any affiliate links. It’s just a cool tool that you might want to check out.
Getting started with Beadographer is easy – there is a very helpful user guide as well as a YouTube video to teach you all the basics plus more advanced tasks. The program was recently updated to store your bead designs in the cloud, so the videos and documentation may not look exactly like the screens right now – but the tools haven’t really changed that much. The biggest change I’ve noticed is how the projects are saved (which is much better now). The YouTube video link above has been updated for the current version of Beadographer – so that’s good news!
I have a new I-Pad, and I really like that Beadographer works on it, including using my I-Pencil. (BeadTool doesn’t run on an I-Pad) That means I can select a bead grid style and use the pencil to select bead colors and draw them in – just like you might do on paper. For me, it’s a big help to visualize colors and design layouts.
Here’s an example of the Beadographer layout and tools. I’ve designed two different 2 drop brick stitch fringe earrings. I’ve also displayed the bead palette so you can see how the beads are pre-loaded and can be searched by bead number or color. I searched for beads with the word “blue” in the name. I haven’t customized a palette yet (I did in Bead Tool 4 and it takes a while), but as I use the tool more and select beads that I own, I can build my own custom palette and then create projects using only beads I own or use that as a starting point and select additional colors as needed.
One of the things I like best about Beadographer is that the brick stitch with fringe is a design I would not have been able to make in BeadTool. I would have to design this in two separate files: the 2 drop triangle section and then a separate fringe section in another file. Beadographer allows you to start with a standard grid layout (like 2 drop brick) and then shift selected rows to have many more layout, and therefore design, options.
I tend to design in Beadographer like I do on graph paper, drawing multiple designs in one file so I can compare. But that’s not ideal if you want it to generate a word chart. For the brick stitch earring example above, I would make each earring in a separate file to get the word chart. I really haven’t tested that since I normally work from a bead graph (i.e. the picture).
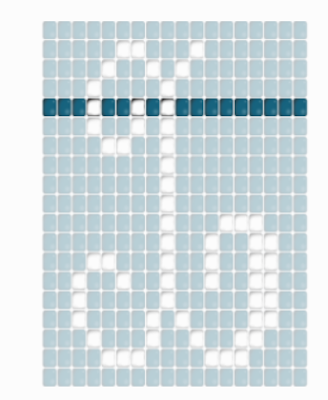
A cool feature if you like to stitch from bead charts is the beading tool icon. It allows you to highlight a row that you are working on, and then use the arrow keys to navigate to the next row. It essentially walks you through each row of the project and holds your place in the design, like many people do on a printed chart using a ruler or a piece of paper.
One thing I just noticed that’s missing from the newest version is the ‘bead cat’, which is a fun interactive help tool. An animated cat would sit in the top right corner of the page and describe the icons and how to use them when you selected one. I hope the cat comes back! You could always turn him off if he was getting in the way. For me, I’m used to beading with a cat lurking about, so a digital one is perfect!
There are lots of other features, like being able to generate a bead design from an image file, selecting and replacing a section of beads or all beads of certain colors throughout a design, using a fill tool to fill in large areas with color, a mirror tool that lets you draw one side of a design and it automatically mirrors the layout on the other side of a vertical or horizontal axis, highlight and move beads, etc.
Let me know in the comments if you use a beading design tool on your computer (and which one!) or prefer to hand draw your designs.
I know there are a couple of other bead design tools beside Beadographer and BeadTool, but I haven’t had enough experience with them yet. For me, it takes a bit of time to get proficient with these bead drawing tools – but they’re lots of fun to play with. I won’t be replacing BeadTool with Beadographer since they both have different strengths, but the low price of Beadographer makes it a great addition to my beading design kit.


